Experiencing motion sickness while using your iPhone or iPad in a moving car is a common issue every user has dealt with at some point. To help combat the issue, Apple, with iOS 18, added a new accessibility feature named Vehicle Motion Cues that aims to prevent motion sickness, allowing you to comfortably use your iPhone while in a moving car.
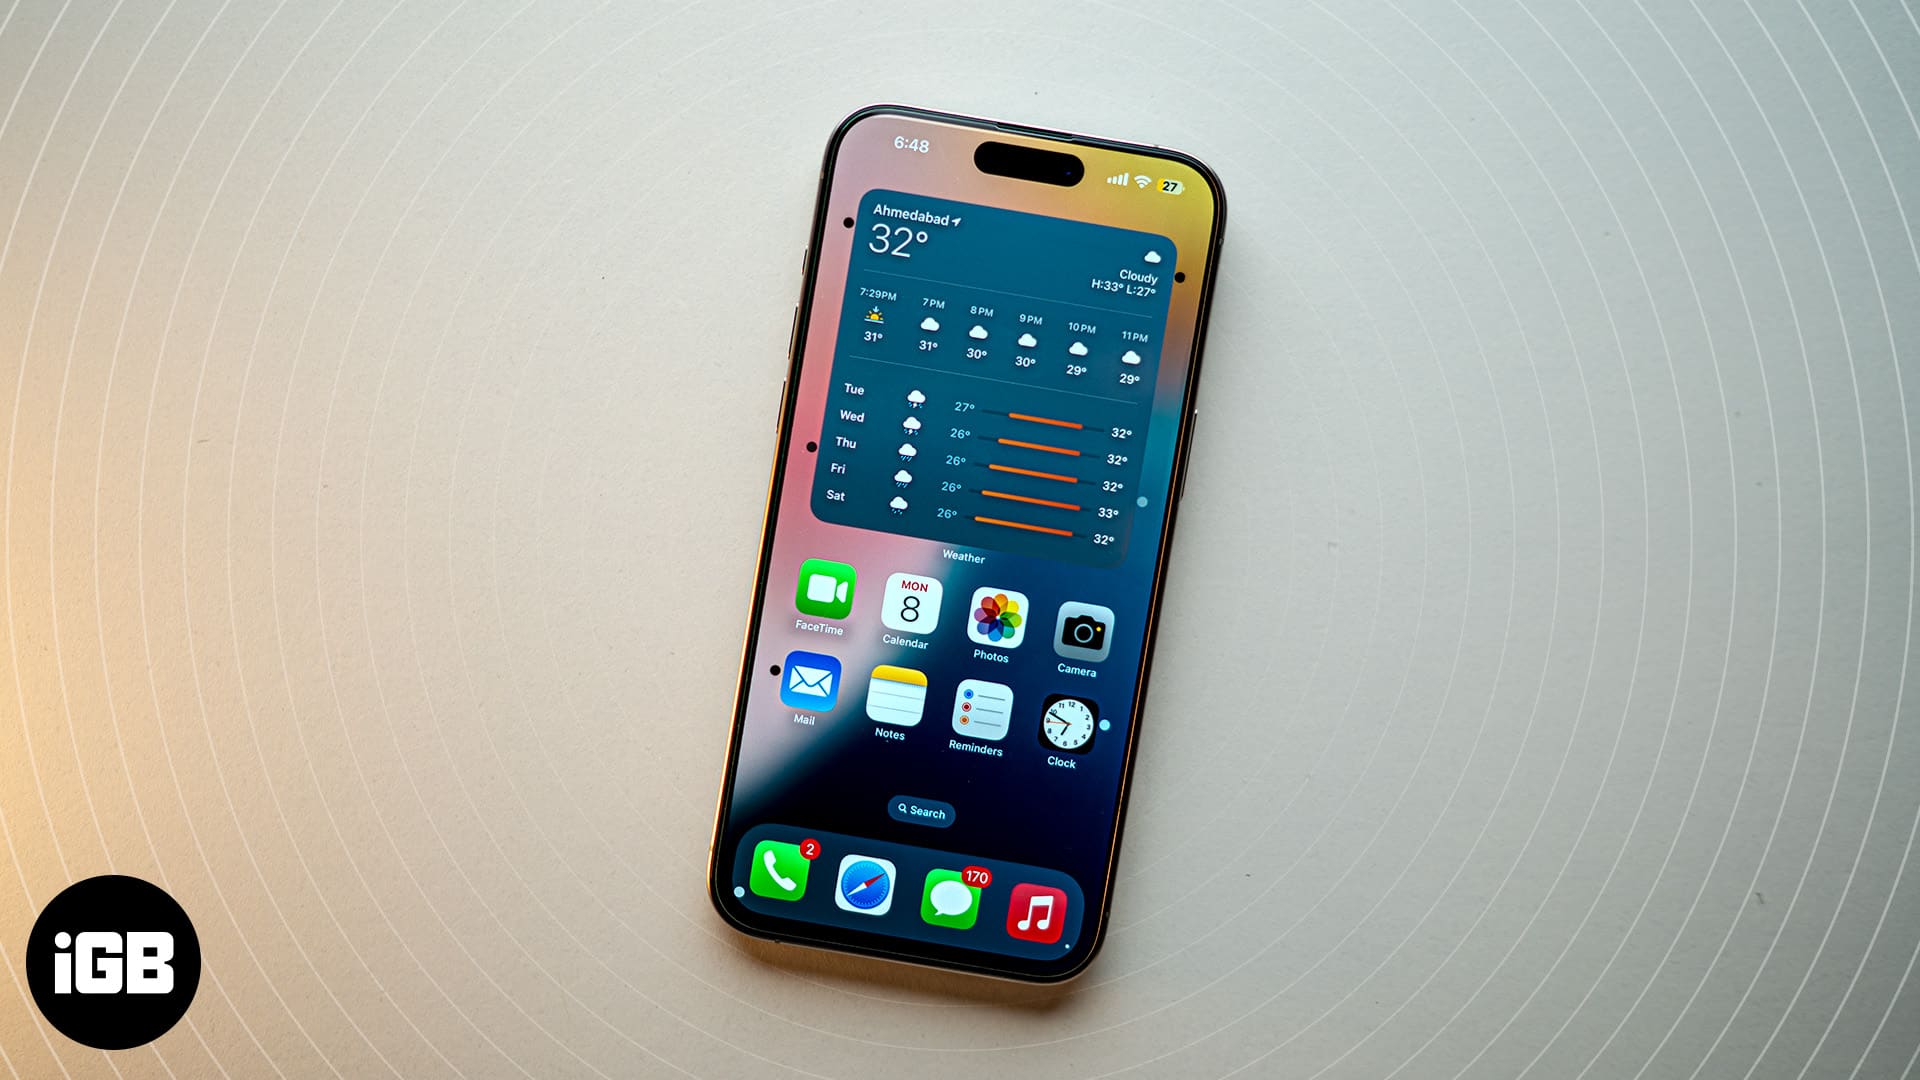
In this guide, I will explain what Vehicle Motion Cues is and how to enable the feature on your iPhone to enjoy a comfortable road trip.
Why do we get motion sickness?
The primary cause of motion sickness is when our body’s sensory organs, mainly the eyes and inner ears, send conflicting signals to our brain. When sitting in a moving car, the inner ear senses motion, but if your eyes are focused on stationary objects, such as your iPhone’s display, they don’t perceive the moving car’s motion. This sensory disconnect between what your body feels and what your eyes see causes your brain to get confused, making you feel nauseous, dizzy, and uncomfortable.
What is Vehicle Motion Cues in iOS 18, and how it works?
The Cupertino tech giant has found in research that most people experience motion sickness due to the sensory conflict between what they feel and what they see on their iPhone screens while in a moving vehicle. This makes it difficult for them to use their iPhones comfortably when on the move, as they constantly feel nauseous.
With the Vehicle Motion Cues feature turned on, animated dots appear on the edge of your iPhone display. These dots represent changes in vehicle motion that prevent the sensory conflict that causes motion sickness, allowing you to focus better on the main content.
The iPhone uses built-in sensors to recognize the change in motion when the user is in a moving vehicle and act accordingly.
How to turn on Vehicle Motion Cues in iOS 18
The Vehicle Motion Cues is a new Accessibility, so you must head to Accessibility settings to enable it.
- Open the Settings app on your iPhone.
- Tap Accessibility.
- Here, tap Motion under the Vision section.
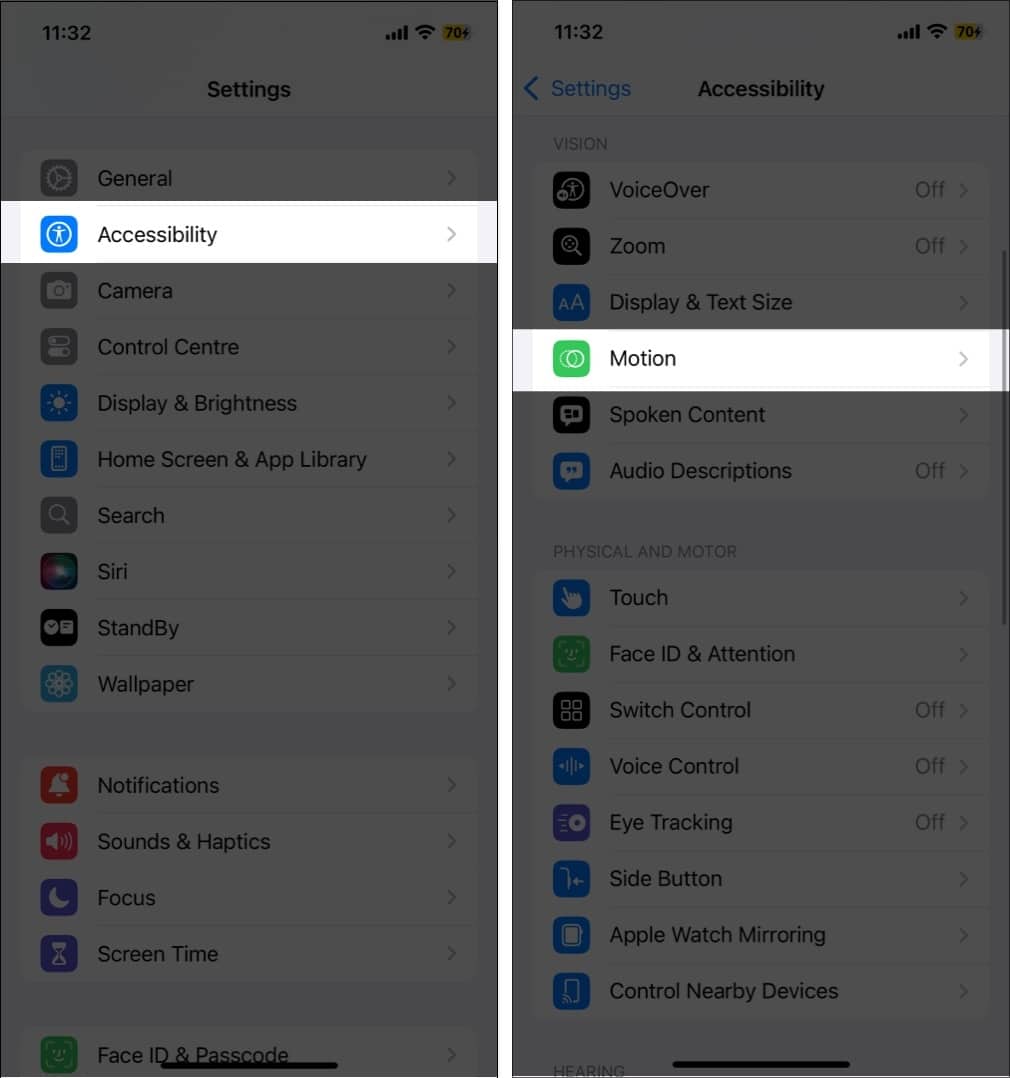
- Next, tap Show Vehicle Motion Cues on the subsequent menu.
- Now, select whether you want the Vehicle Motion Cues to turn on automatically or your iPhone to display the dots right away.
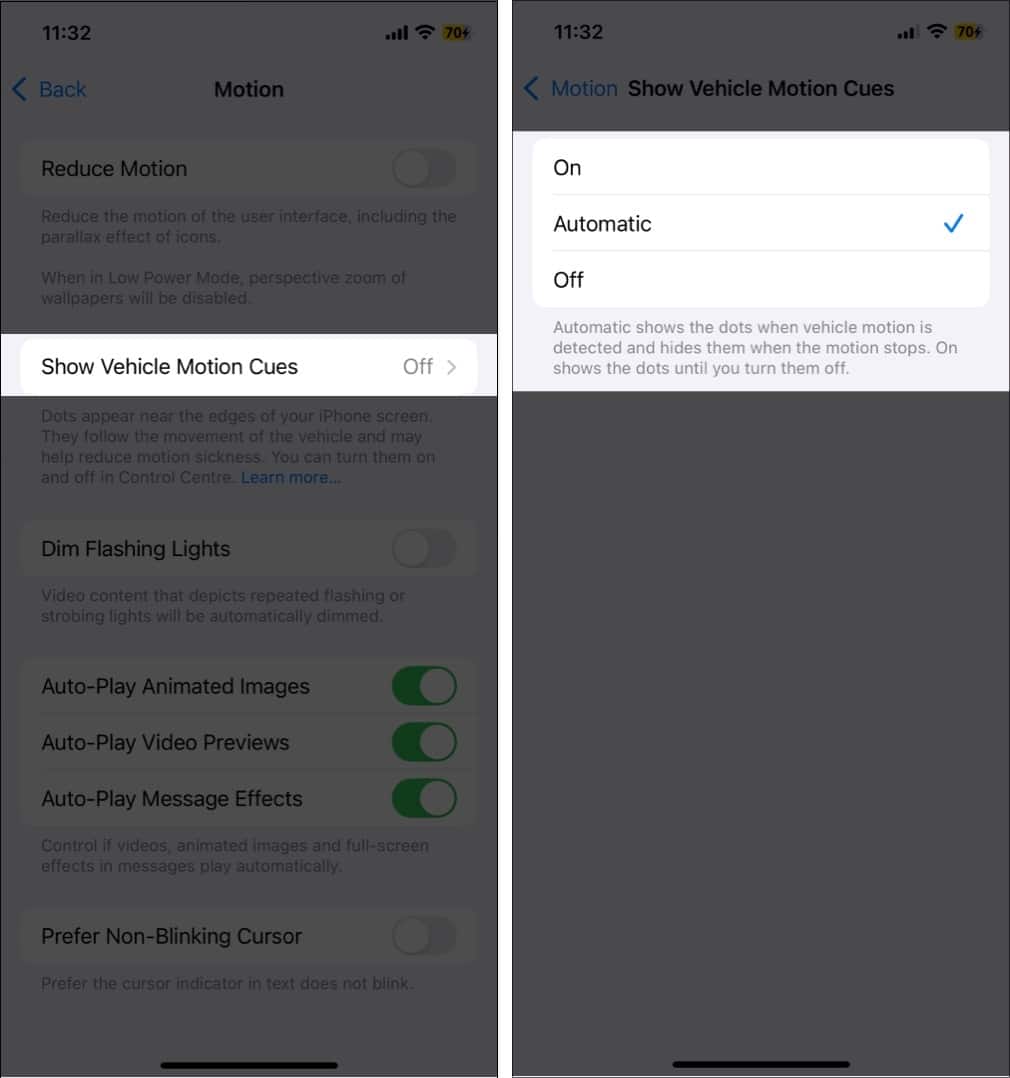
If you choose the Automatic option, every time your iPhone’s built-in sensors detect a change in motion, the Vehicle Motion Cues feature will be activated automatically, and the animated dots will appear on the screen’s edges.
Become an iGeeksBlog Premium member and access our content ad-free with additional perks.
Ho to access Vehicle Motion Cues from the Control Center
While you know you can turn Vehicle Motion Cues on or off within iPhone settings; Apple also allows you to add the Vehicle Motion Cue control button to the Control Center to use the feature on your whim. Here’s how:
- Swipe down from the top right to pull down the Control Center.
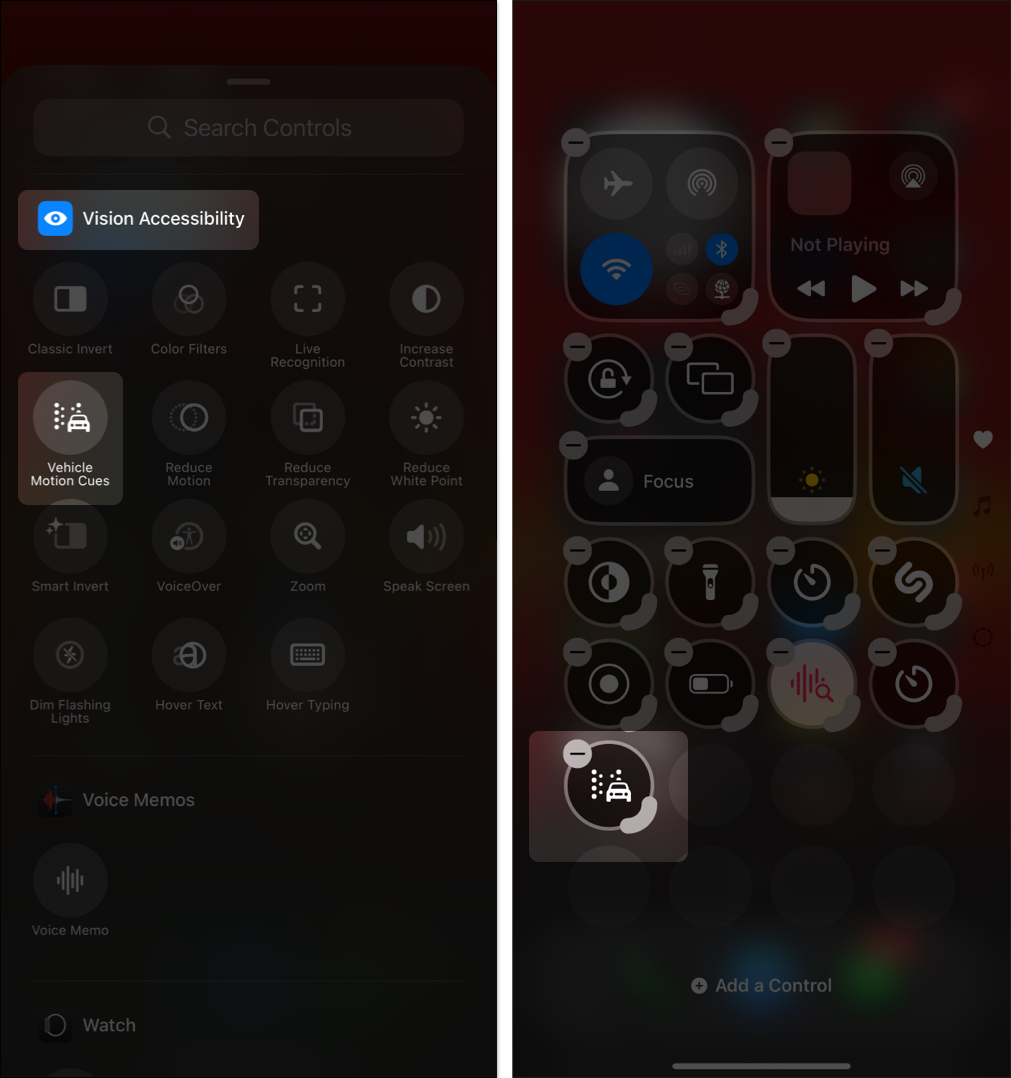
- Here, tap the + button at the top left to customize the Control Center in iOS 18.
- Next, tap Add a Control at the bottom center.
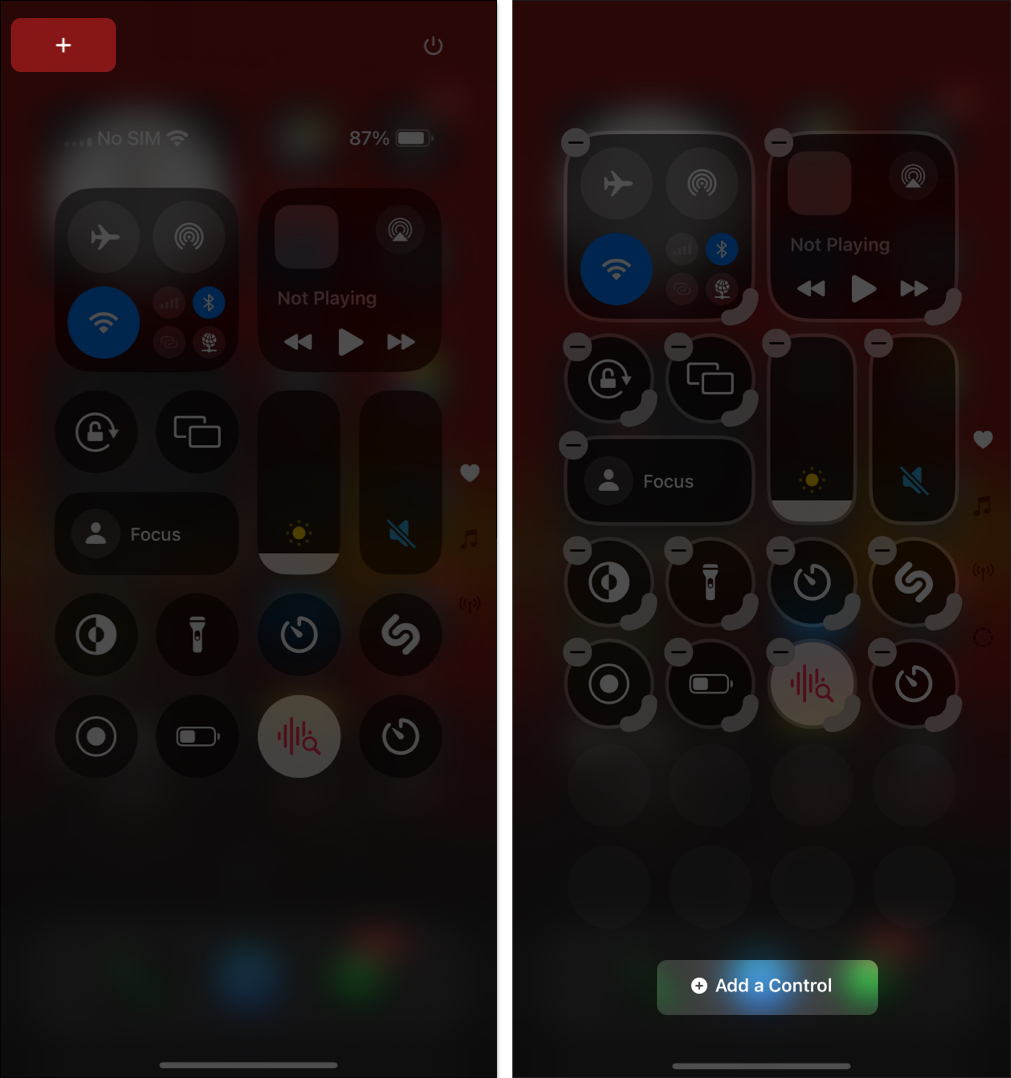
- Now, locate and tap the Vehicle Motion Cues tile to add it to the Control Center.
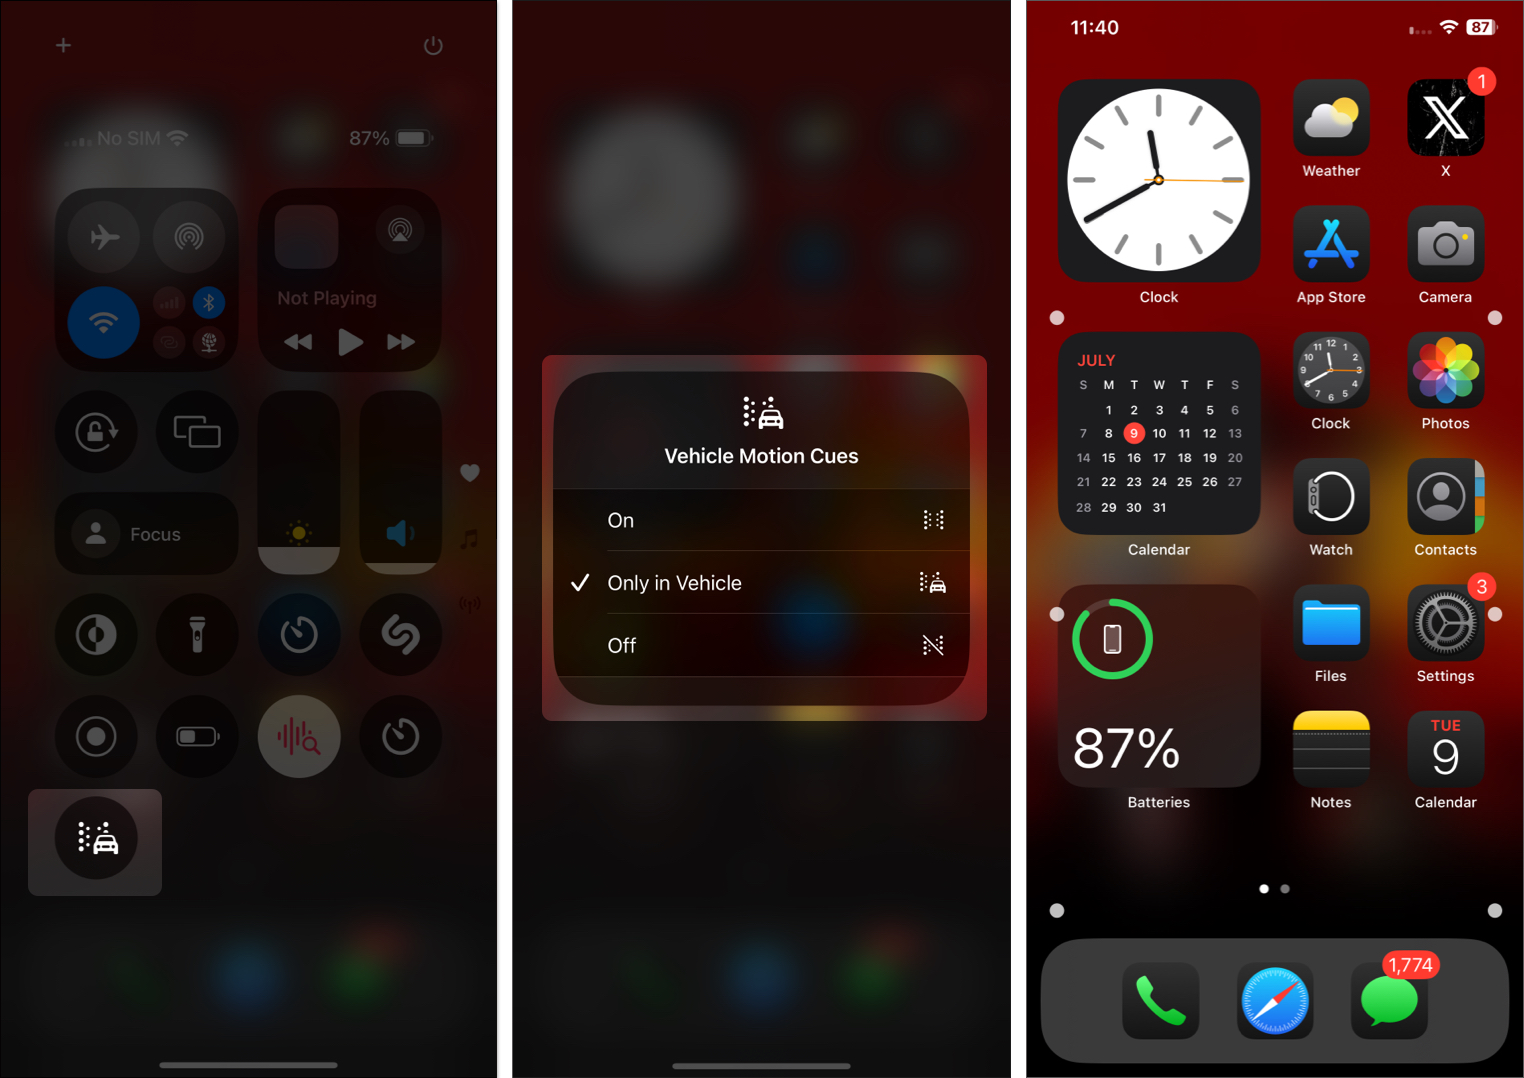
- Now, tap the Vehicle Motion Cues button and choose the appropriate option in the pop-up menu that appears.
- While the feature by default is set to Only in Vehicle, you can set it to ON, and animated dots will appear at the edges of your iPhone’s display, or Off, and the animated dots will never appear.
Motion sickness eliminated…
The addition of the Vehicle Motion Cues accessibility feature is a welcome step and can be a boon for users who are prone to motion sickness when in a moving vehicle. However, we will have to wait until further user reports are available to comprehend the effectiveness of this feature. In addition, Apple also added a bunch of other accessibility features, such as Eye Tracking and Vocal Shortcuts, to the iPhone with iOS 18.
What do you think of the new accessibility features in iOS 18? Do share your thoughts in the comments.
Read more:
