While voicemail’s popularity has declined over the years, it’s still useful in situations where immediate conversation isn’t possible. As such, it can get quite frustrating if your iPhone voicemail is not working.
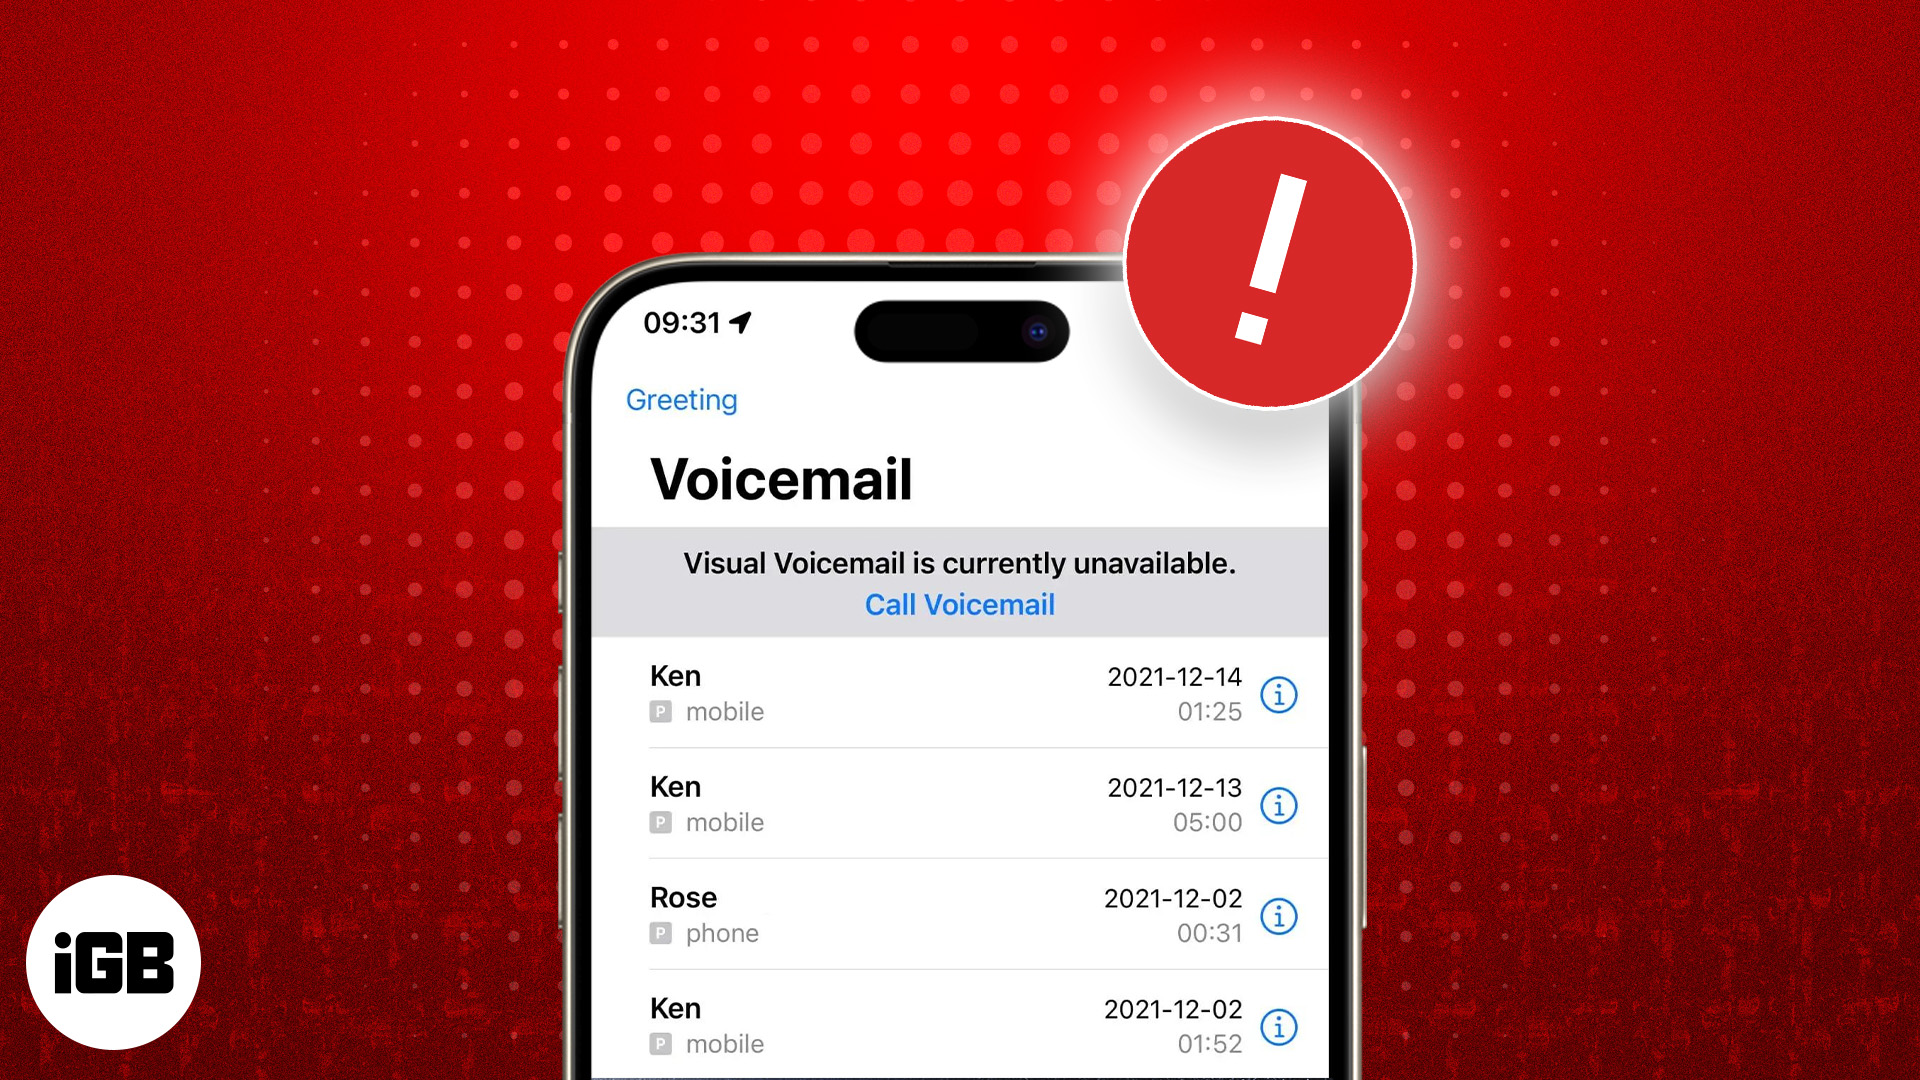
But fret not. This guide will help you troubleshoot voicemail issues on your iPhone so you can start using it again.
How to fix your voicemail not working on your iPhone
There could be several reasons why voicemail is not working on your iPhone correctly. It might be due to incorrect settings, a software glitch, or an issue with your carrier.
In most cases, simply restarting your iPhone can resolve the problem. But if it doesn’t, you can follow the troubleshooting steps below to fix it.
1. Ensure voicemail is set up correctly on your iPhone
If you’re unable to access or use voicemail on your iPhone, the first thing you need to do is ensure that you’ve set up voicemail correctly. Sometimes, you may need to set up voicemail all over again if you’ve recently installed an update, switched carriers, or changed your cellular plan.
To check if the voicemail is set up correctly on your iPhone, open the Settings app and tap on Phone. If you’re able to locate the Change Voicemail Password option at the bottom, then voicemail is already set up, and you’re good to go.
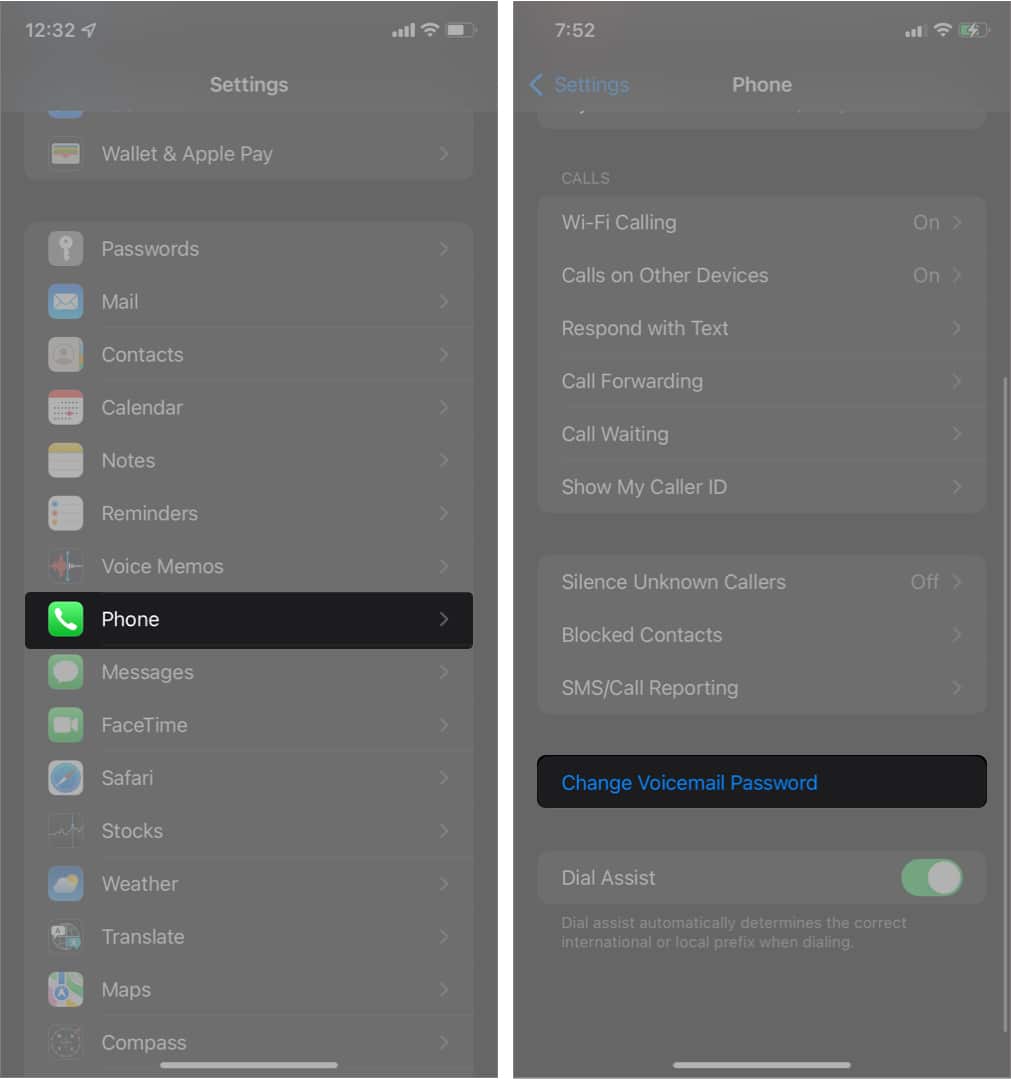
If you can’t find the Change Voicemail Password option, then you must set up voicemail on your iPhone from scratch.
- Open the Phone app and go to the Voicemail tab.
- Tap on Set Up.
- Create a voicemail password and record your custom greeting to complete the setup.
2. Force close and relaunch the Phone app
If voicemail seems non-functional, even if it’s set up correctly, it could be that you’ve run into a temporary software issue related to the Phone app. Force-closing and relaunching the Phone app can help in this case.
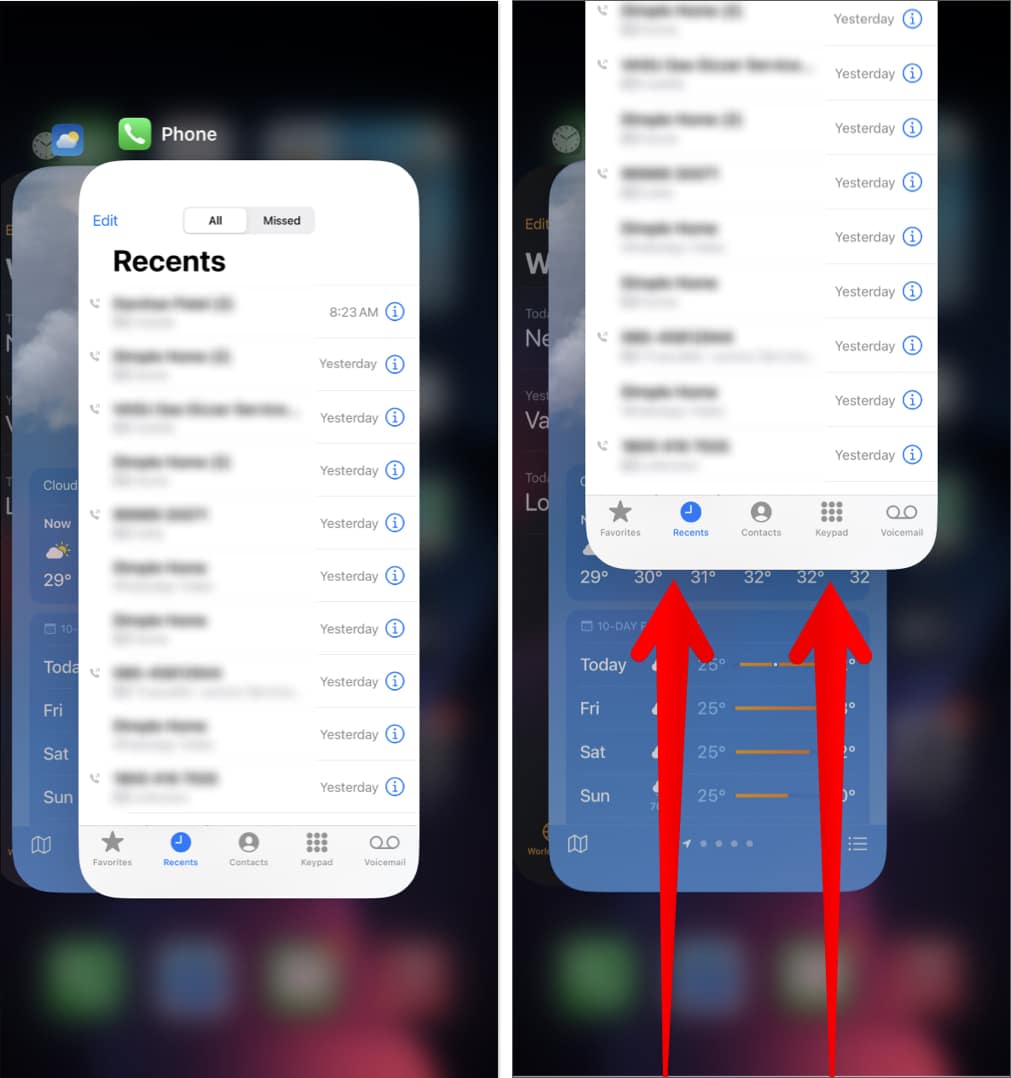
- Access the app switcher on your iPhone.
- Swipe up on the window for the Phone app to close it.
- Then, open the Phone app and check if voicemail is working.
3. Turn cellular data off and on again
Sometimes, turning cellular data off and back on again can resolve problems related to voicemail. Although it may seem rudimentary, this process refreshes your device’s cellular connection, which may clear up any temporary glitches or connectivity issues that could be interfering with the voicemail functionality. Here’s what you need to know:
- Swipe down from the top-left corner of the screen to bring up the Control Centre.
- Tap the green Cellular Data icon to turn off data.
- Tap the icon again to turn it back on.
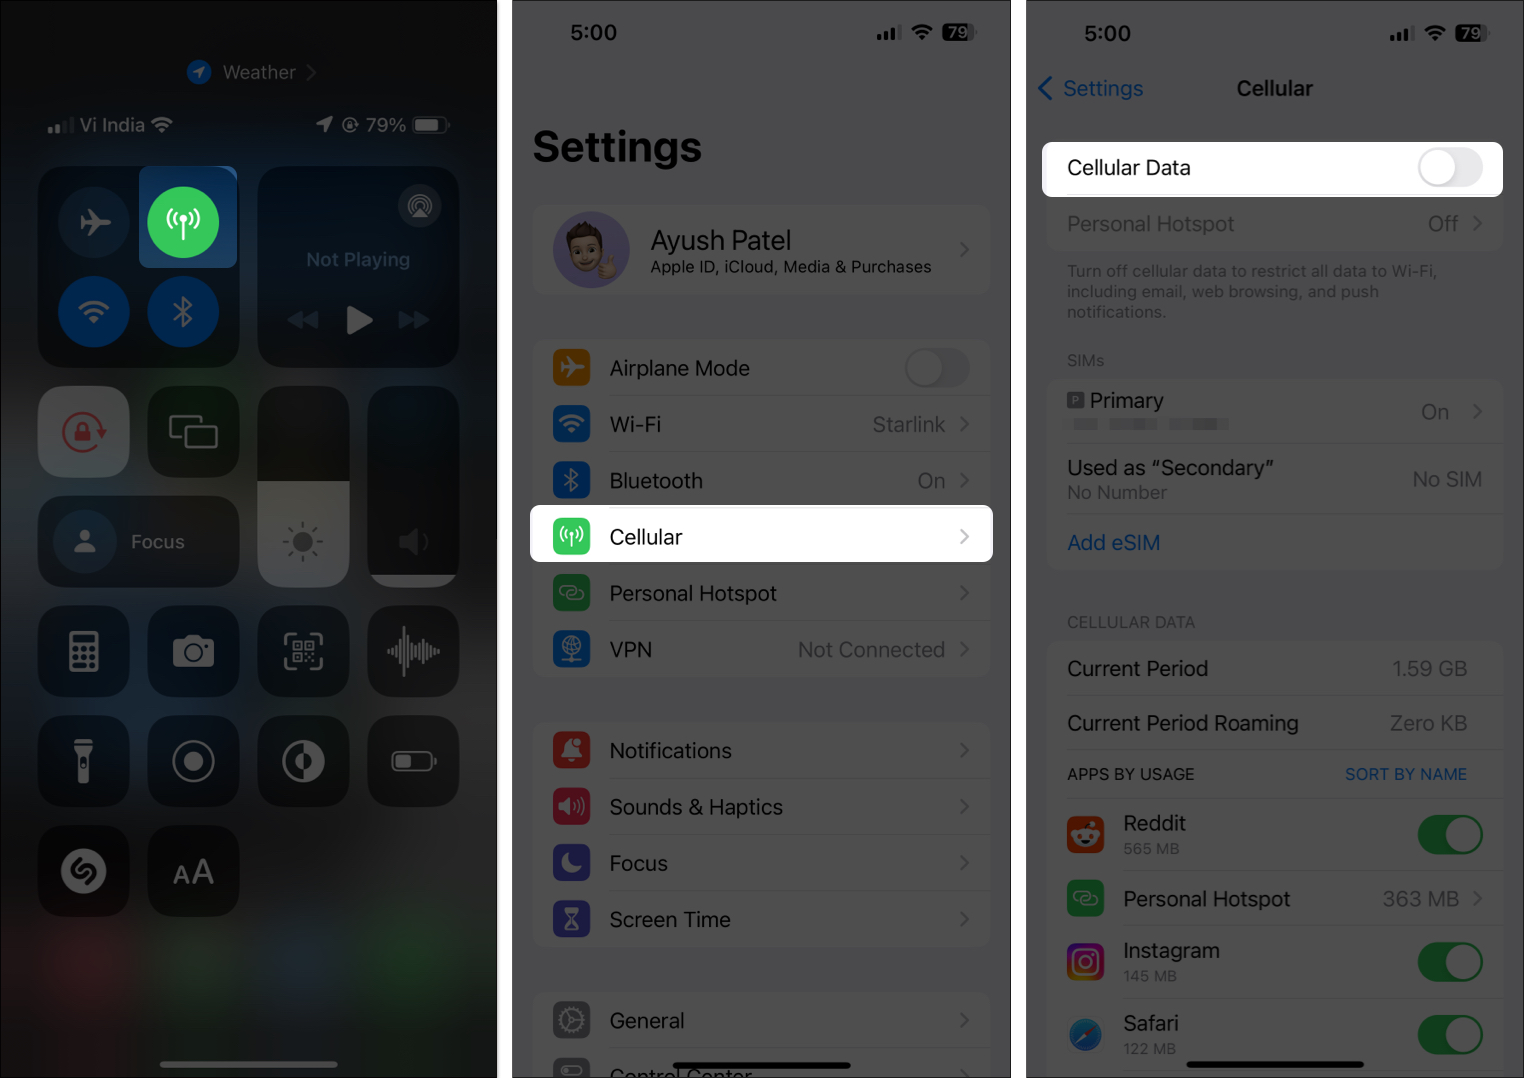
Alternatively, you can open the Settings app, tap Cellular, and use the Cellular Data toggle.
4. Make sure call forwarding is turned off
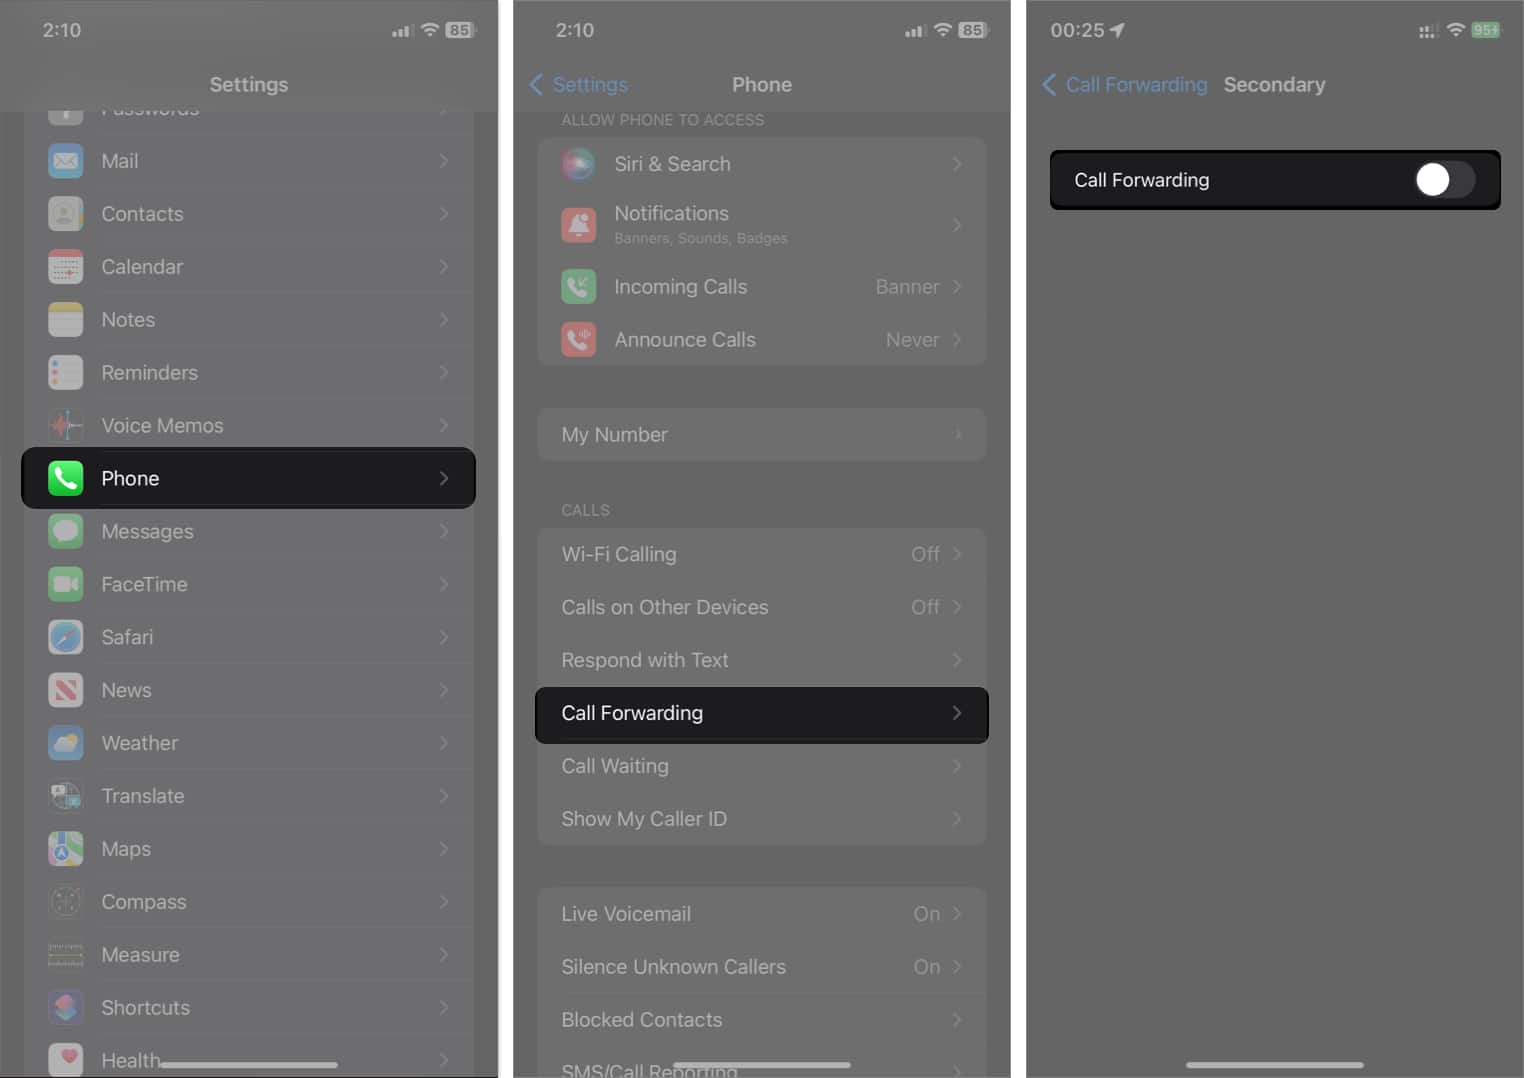
If you’ve enabled call forwarding on your iPhone, it can prevent your calls from going to voicemail. To ensure that this isn’t the reason why voicemail isn’t working on your iPhone, ensure that call forwarding is turned off, like so:
- Open the Settings app on your iPhone.
- Navigate to Phone → Call Forwarding.
- Then, toggle off Call Forwarding.
5. Check for iOS software updates
If call forwarding is already turned off, but you still can’t use voicemails on your iPhone, you may have run into a software bug and need to update your iPhone. Software updates often include bug fixes or improvements that can resolve various problems on iPhone, including those related to voicemail.
Become an iGeeksBlog Premium member and access our content ad-free with additional perks.
- Open the Settings app on your iPhone.
- Navigate to General → Software Update.
- Tap Update Now if an update is available.
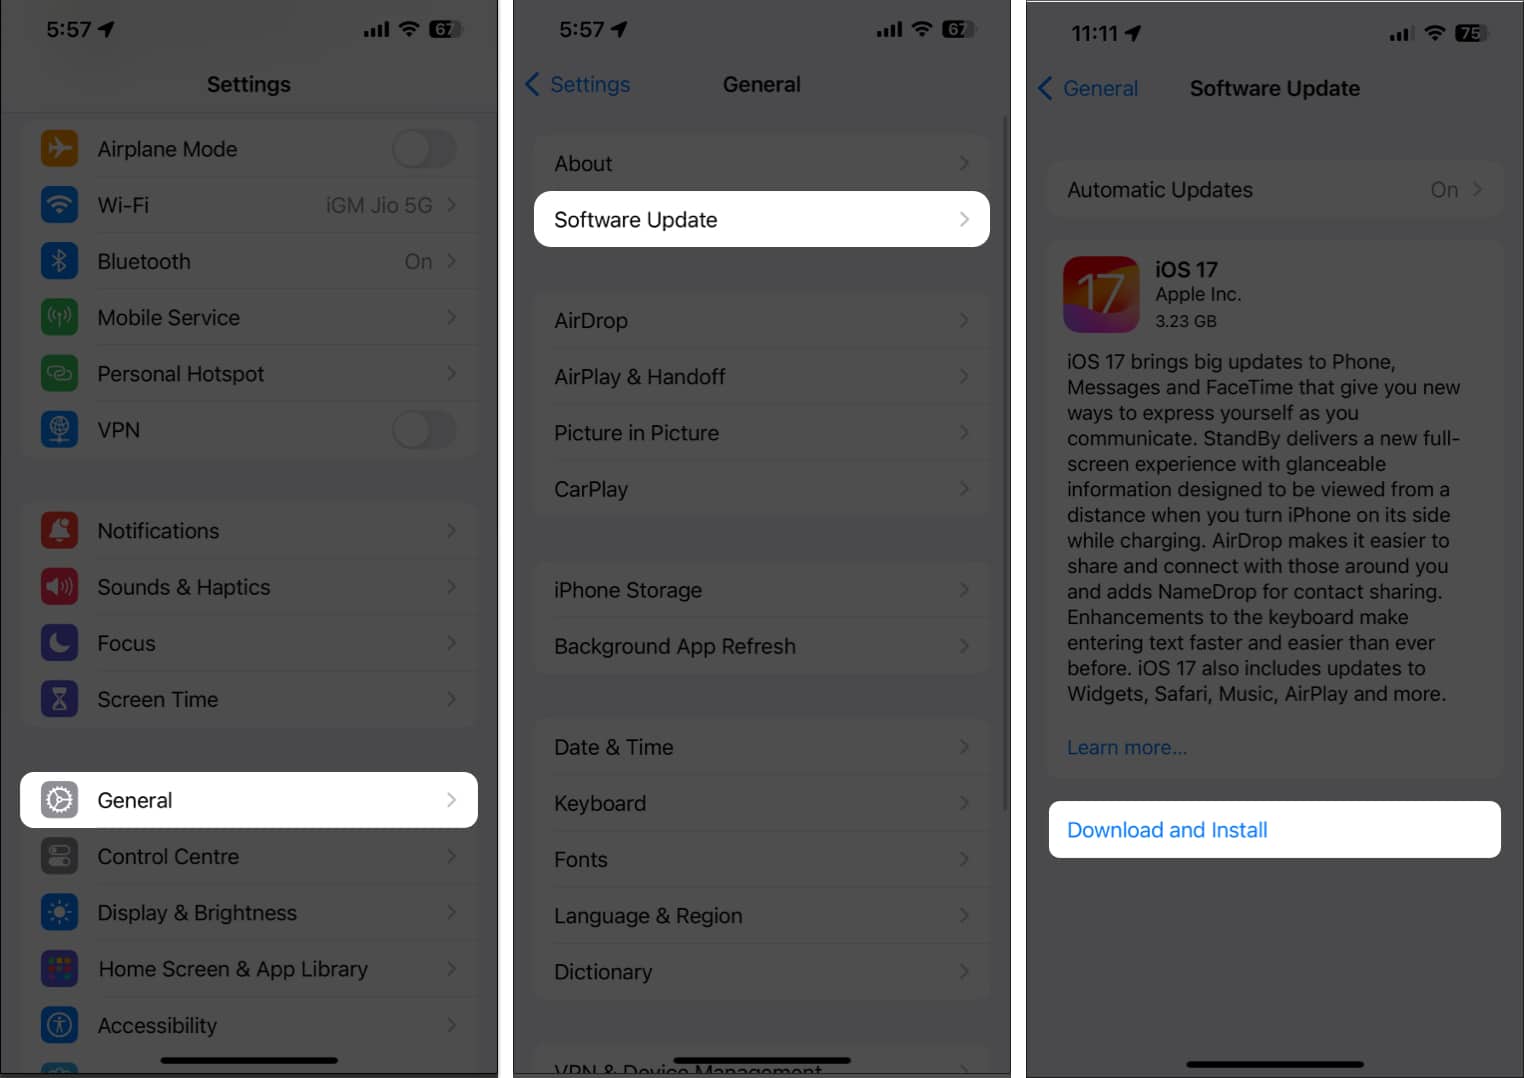
- Enter your iPhone passcode when prompted, and let the device update.
6. Check for a Carrier Update
Besides installing the latest version of iOS, installing the latest carrier settings update can also help you fix issues related to voicemails. Carriers occasionally roll out carrier settings updates to enable new features and resolve network-related issues on iPhones. Updating your device to the latest version ensures everything keeps working smoothly.
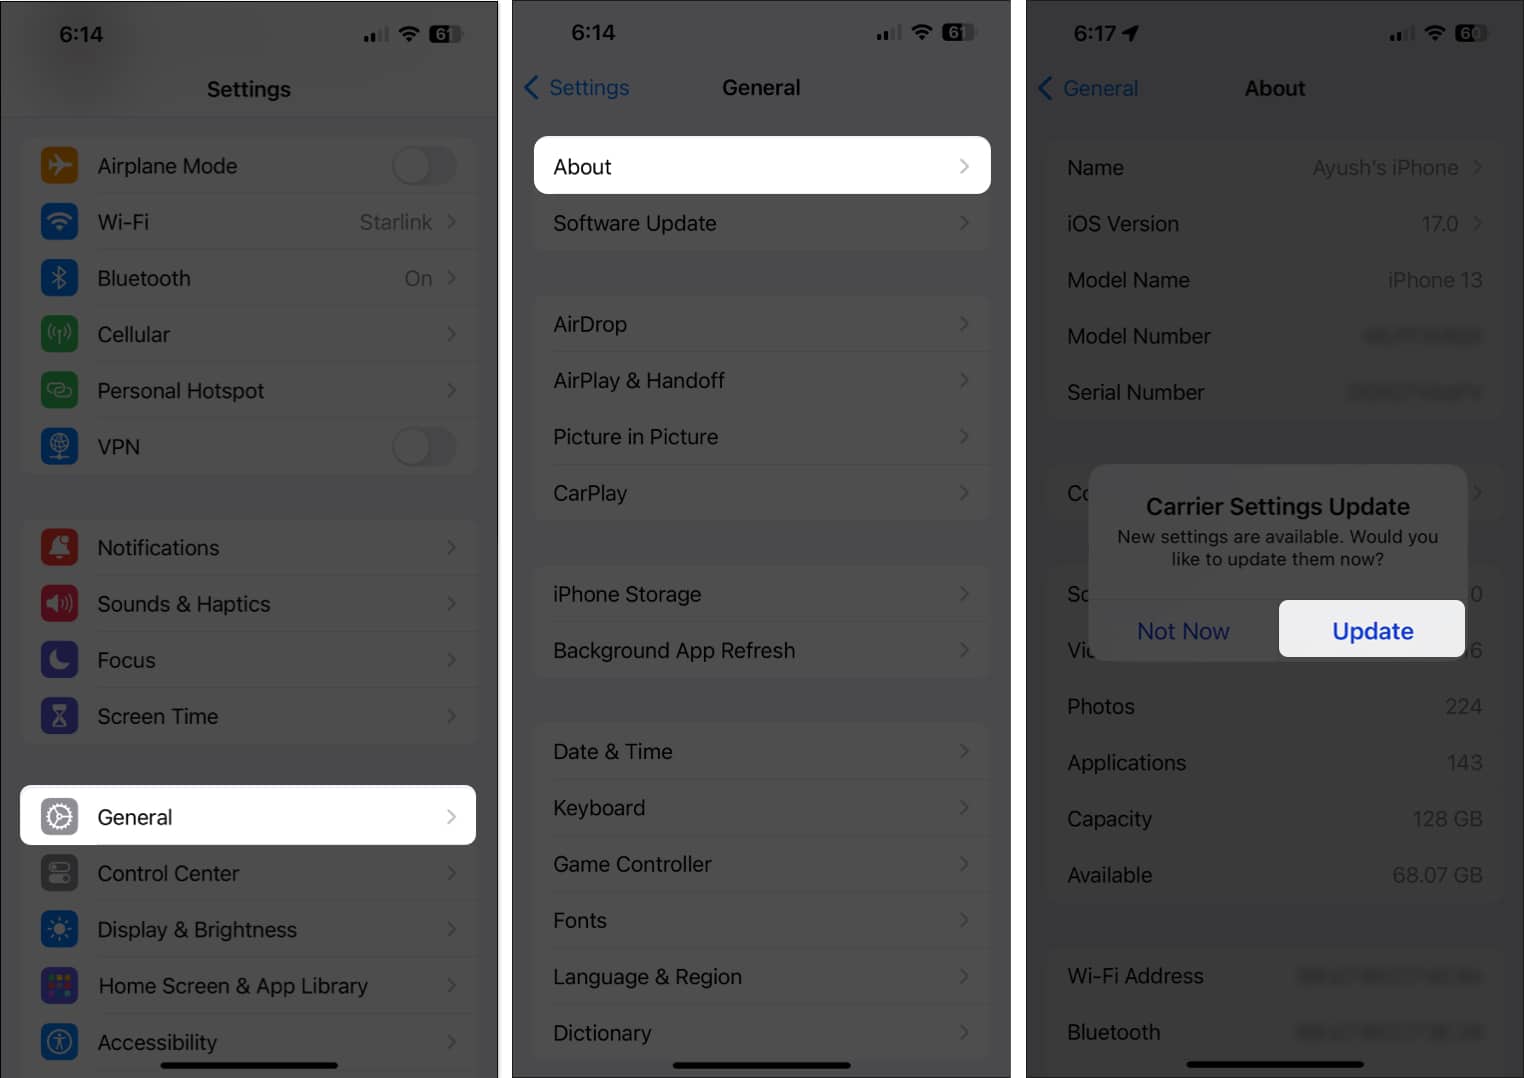
- Open the Settings app on your iPhone.
- Navigate to General.
- Tap About.
- If a Carrier Settings Update dialog pops up, tap Update.
7. Reset the iPhone’s network settings
Misconfigured network settings can often lead to unusual issues on iPhones. If your iPhone’s voicemail is not functioning, resetting the network settings can help. This action will remove all saved Wi-Fi networks, as well as any Bluetooth connections on your device, and revert the APN settings to the default state.
- Open the Settings app on your iPhone.
- Go to General and tap Transfer or Reset iPhone.
- Tap Reset and select Reset Network Settings.
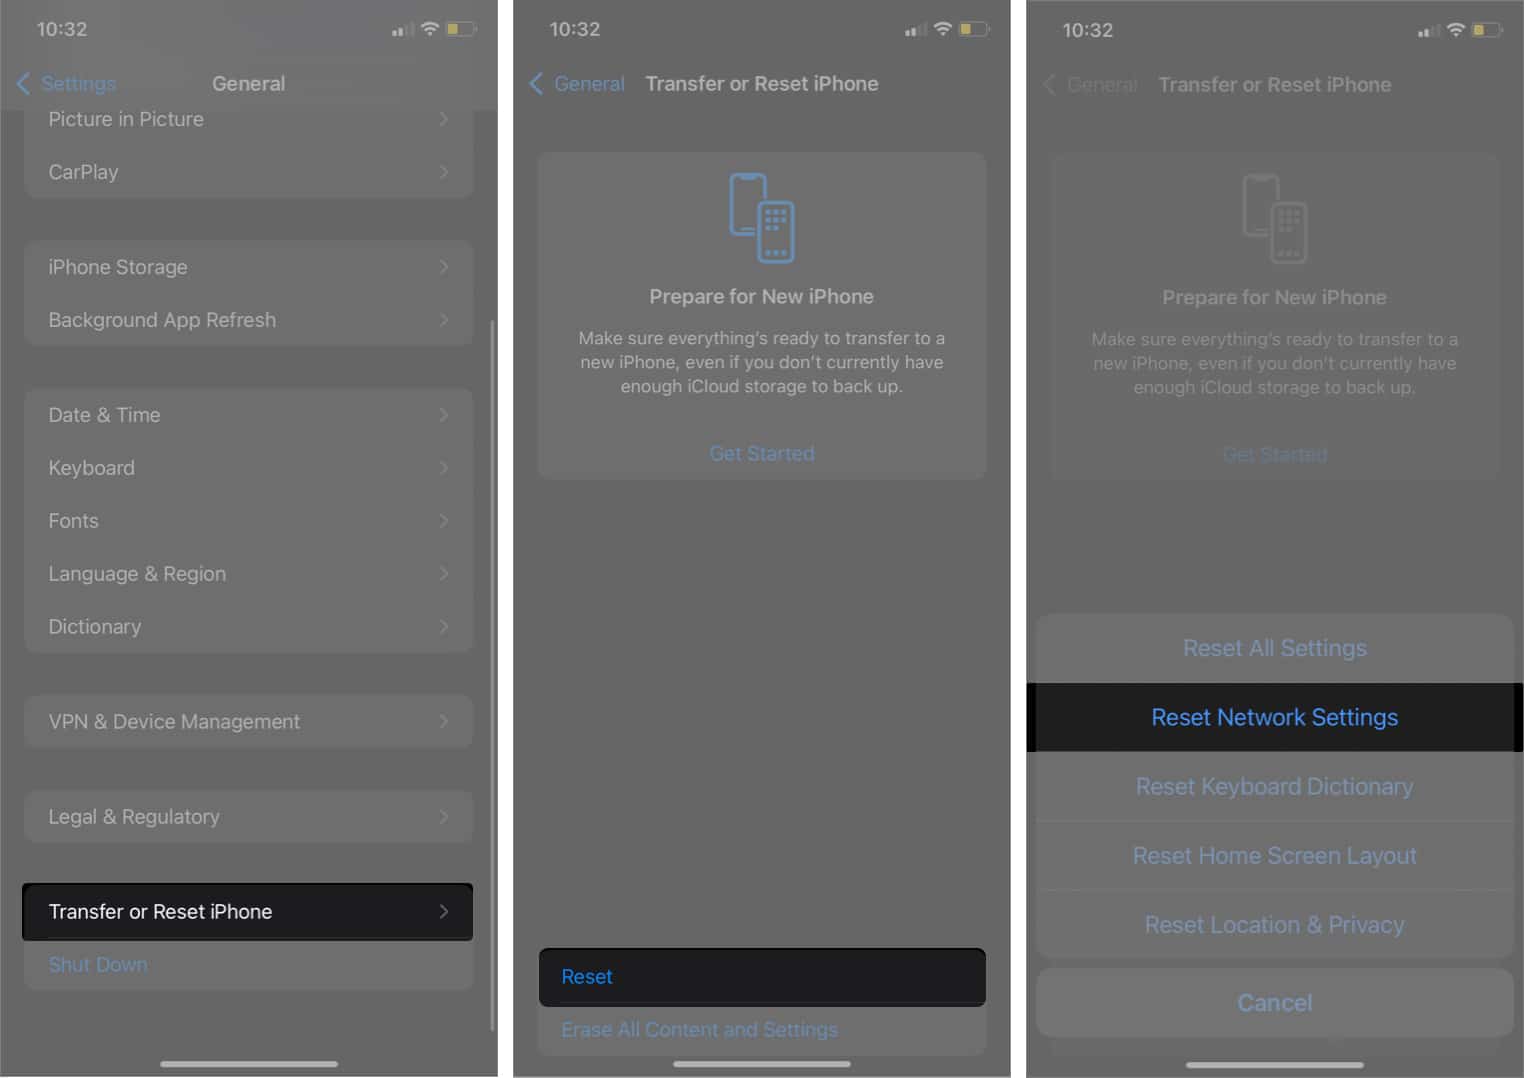
- Enter your iPhone’s Lock Screen passcode.
- Tap Reset Network Settings again.
8. Contact your phone carrier
If you’ve tried everything and nothing seems to work, it’s a good idea to contact your carrier for assistance. It’s possible that your iPhone is just fine, but there’s an issue on the carrier’s end that needs to be addressed.
Depending on the phone carrier, you can use the following customer helplines:
- T-Mobile: 1-800-937-8997
- Verizon: 1-800-922-0204
- AT&T: 1-800-331-0500
Video: Is iPhone voicemail not working? Fix it fast
Signing off…
By following the steps in this guide, you should be able to get voicemail back up and running on your iPhone. However, if you’ve tried everything and voicemail still isn’t working, you may want to contact Apple Support.
FAQs
All iPhones support voicemails, irrespective of their region. However, whether you can use this feature worldwide or not depends on the cellular providers in your region. Moreover, you must subscribe to the feature before you can use it.
To delete voicemails on your iPhone, open the Phone app → tap the Voicemail button at the bottom-right corner. Now, swipe left on the voicemail you want to delete and tap Delete. If you need further help with deleting voicemails, you can refer to our step-by-step guide on how to delete voicemails on your iPhone.
Also read:
