Like your pictures, to give you a good viewing experience, even your Video requires an excellent orientation. Maintaining the wrong orientation video will adversely affect the user’s actuality while viewing a video on your iPhone. When viewed in landscape mode, videos are often more accessible as it takes more room to achieve the optimal viewing experience. So, here’s how you can rotate videos from the photos app and iMovie on your iPhone and iPad.
How to rotate video on iPhone and iPad
- Click on the Photos app and find the video to rotate it.
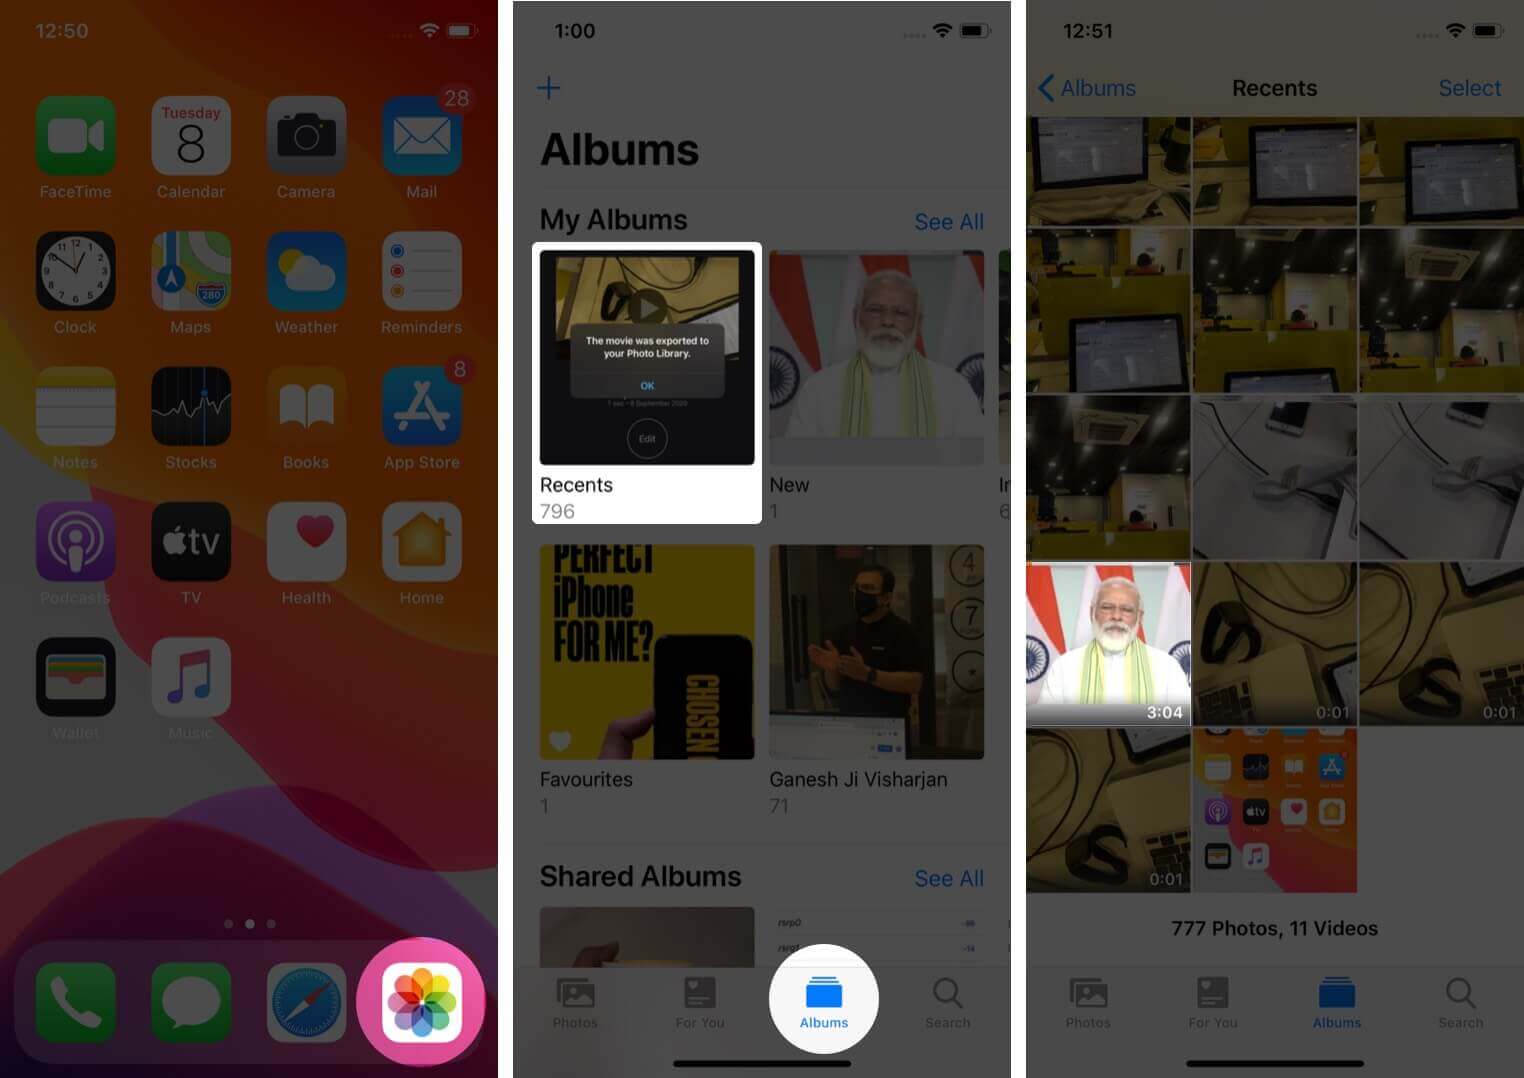
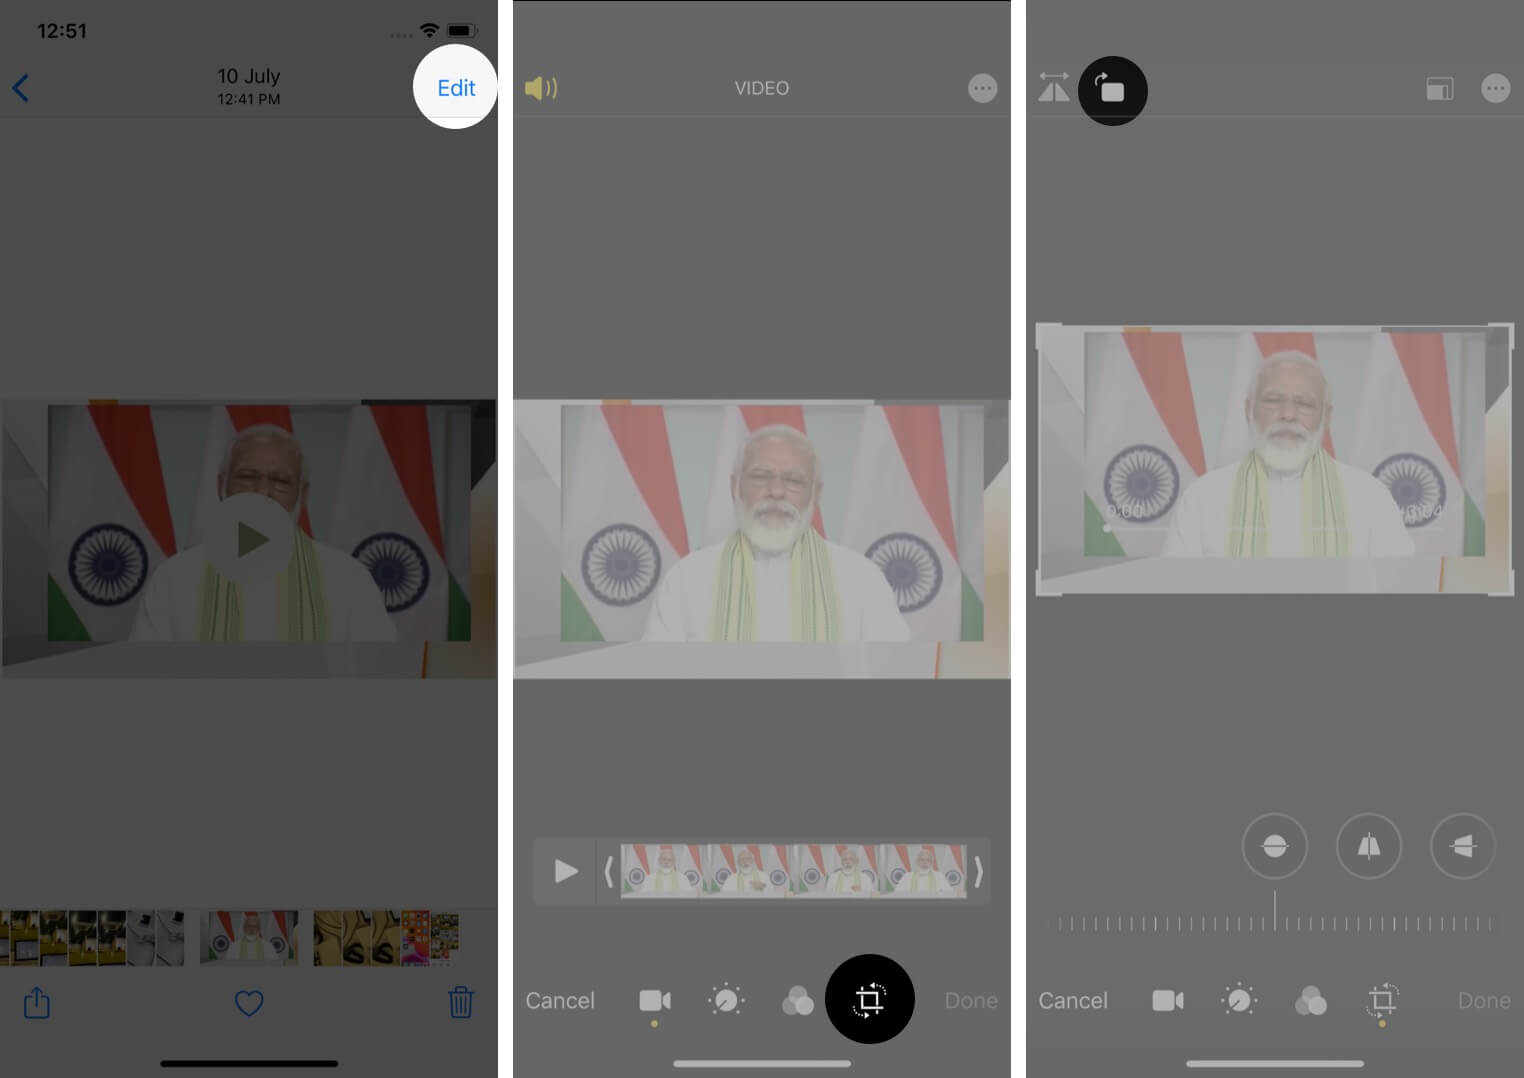
- Tap on “Edit,” and under the edit icon, tap on “Crop.”
- You will find two icons above on the left-hand side, tap on “Rotate,” and on each tap on the rotate icon, the video’s orientation will change. To change the orientation from “Portrait” to “Landscape.”
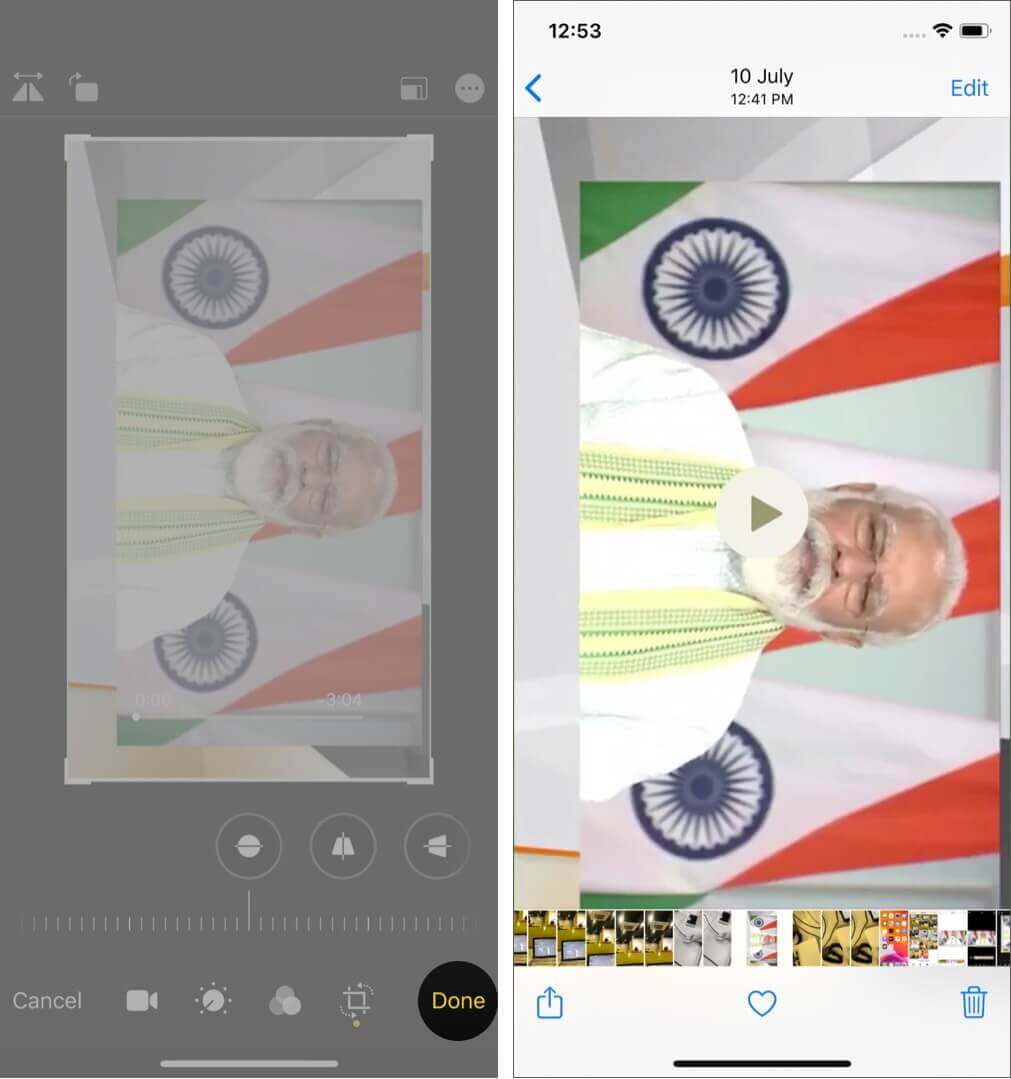
- Tap on “Done.”
- Video created will be saved in “Landscape mode”.
Rotate video on iPhone Using iMovie
- Download the “iMovie” app on your iPhone
- Open the “iMovie” app and tap on “Create Project.”
- Tap on “Movie”.
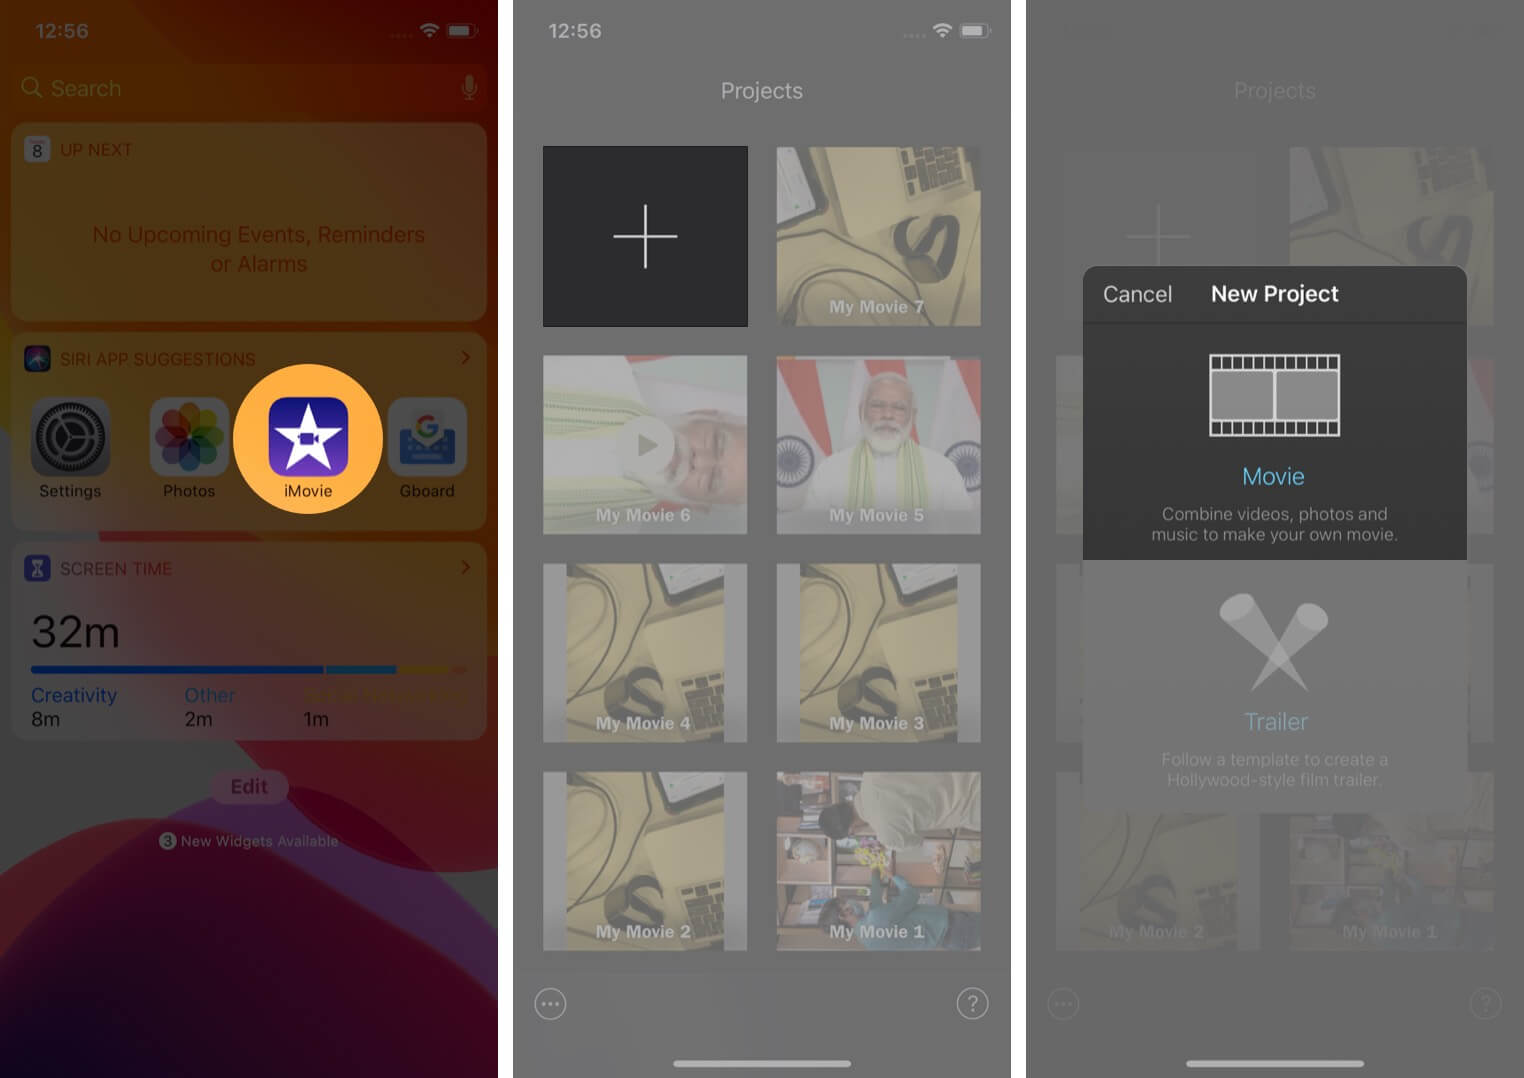
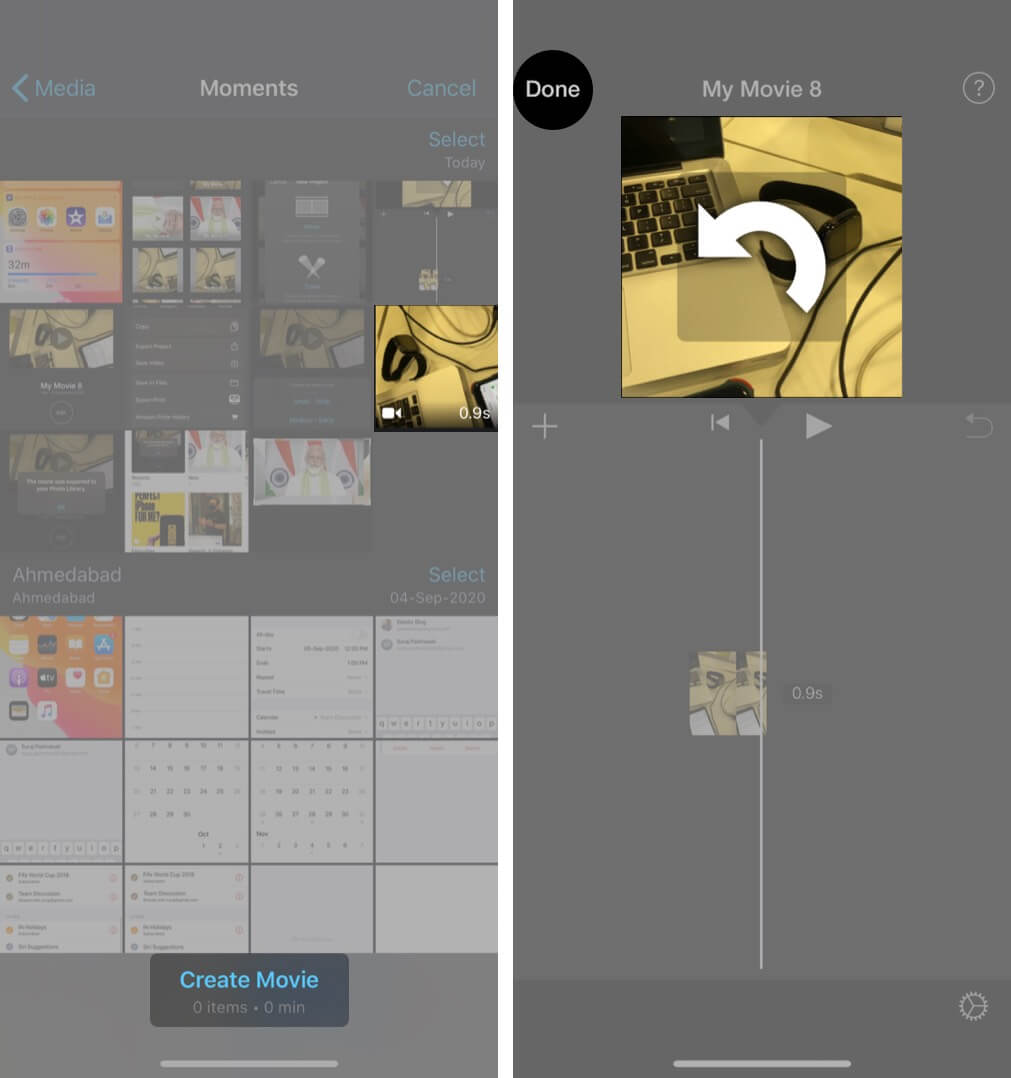
- Select the video to edit and change the orientation.
- Tap on “Create Movie” and with your two fingers, rotate the video “Anti-Clockwise” and tap on “Done.”
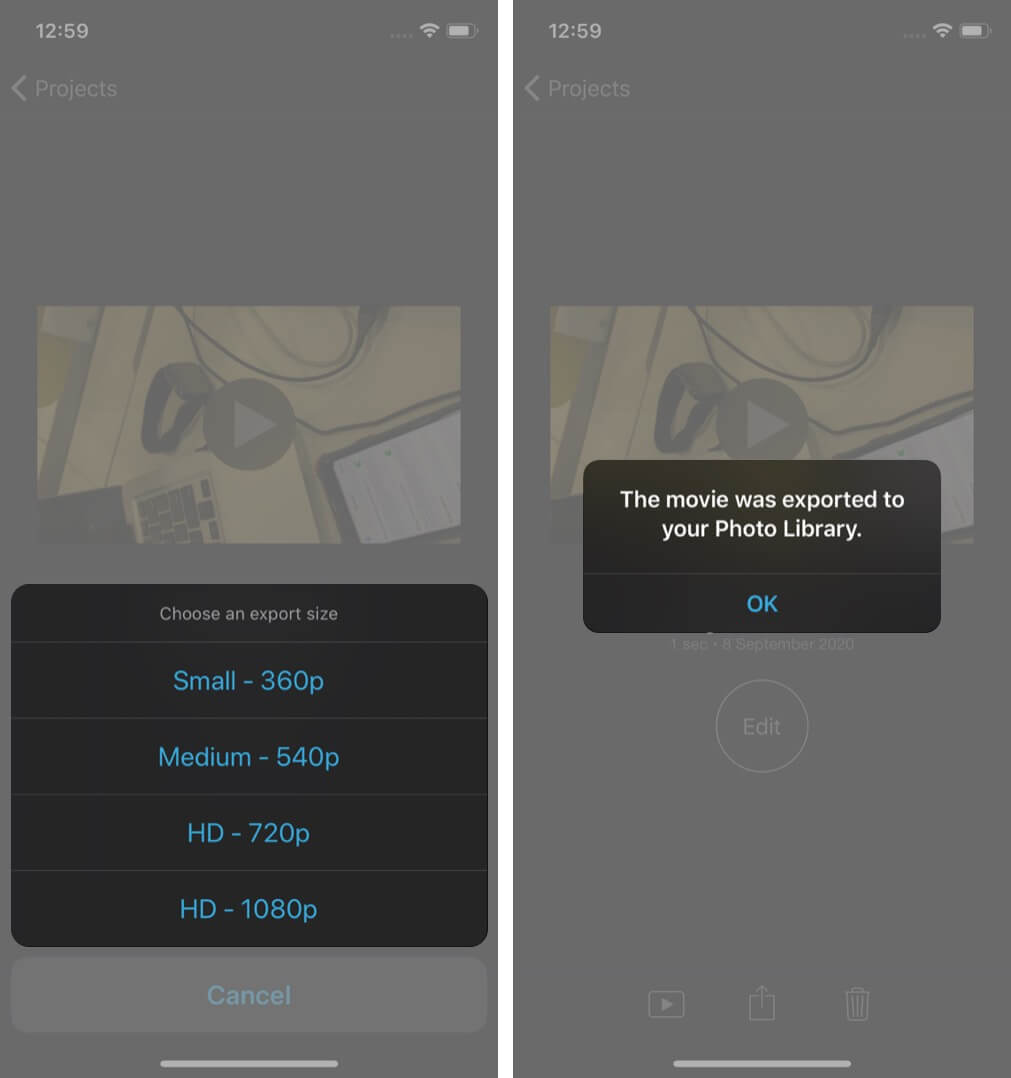
- Under the “Share” icon, tap on “Save video” and choose the “Export size.”
And you can view your Rotated video in your “Photo Library.”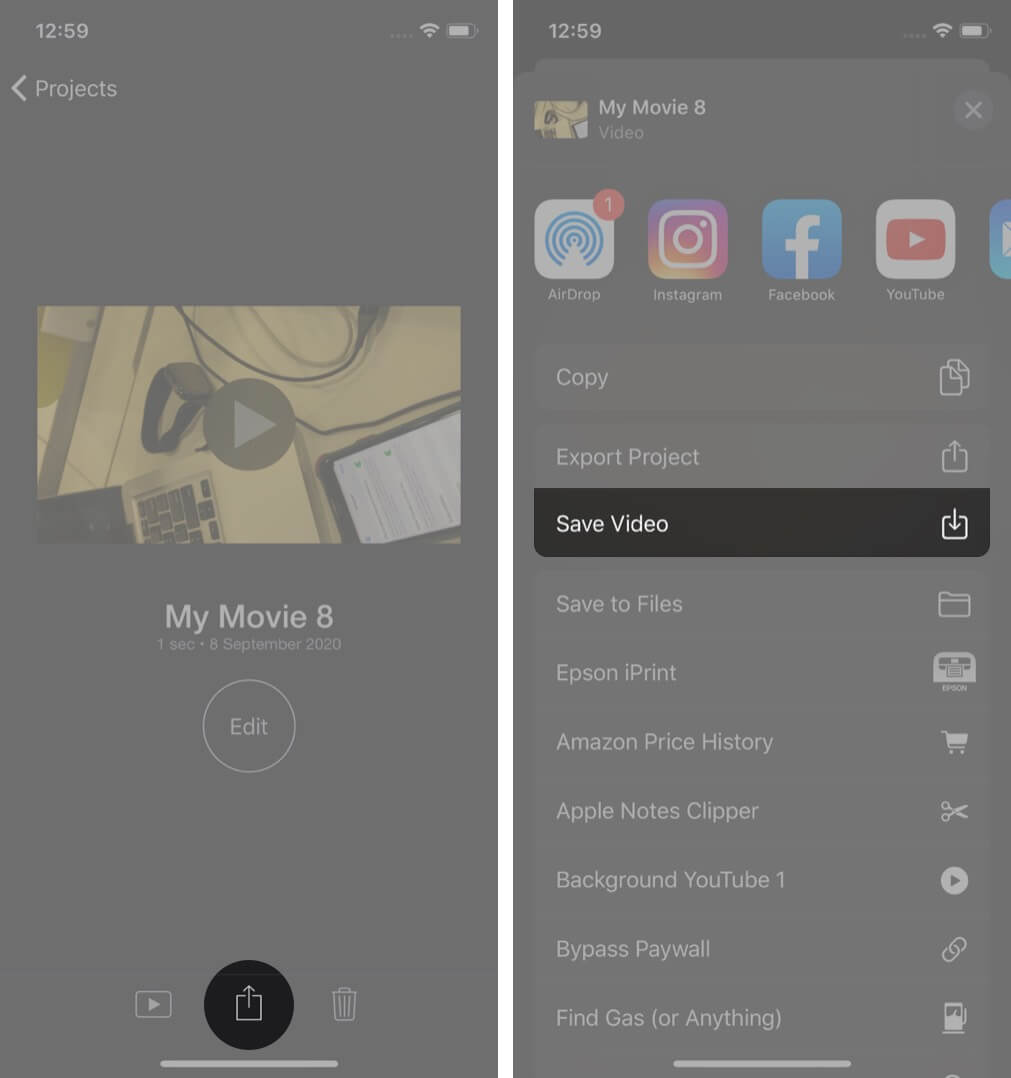
Signing Off!!
Become an iGeeksBlog Premium member and access our content ad-free with additional perks.
1080p can be used as the appropriate export size to export your iMovie video to iPhone as long as one of the clips in your project was originally created in one of these formats. If you enjoy shooting videos on your iPhone, it’s a good idea to stay up to date and edit your videos like a pro.
Do share your views below in the comment section.
Next time, we’ll see you with more such insights. Until then, keep editing and exploring with your camera lenses.
Other Content you may find useful:

